Renting Space Pt. 2
Renting Space from the Org. Site
- To book a space from the Oregon School District organization page, begin by scrolling down to find the facility that you would like to rent from. When you find your ideal facility, you may click on the picture or the text of the facility. If you would like to learn how to search for space from the homepage, please refer to Renting Space Pt. 1
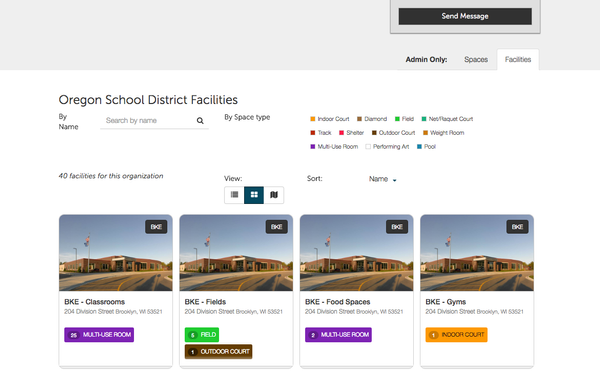
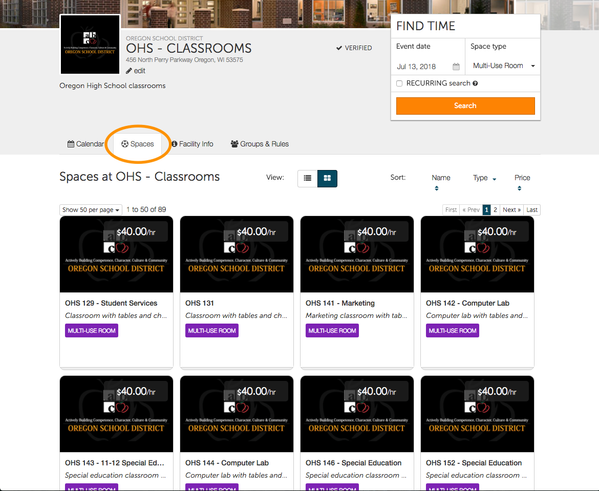
- Once you have clicked the facility you would like to rent, you will be directed to the facility page. The facility page will show a calendar of all spaces from that facility and their corresponding availability. The calendar will show what spaces are available to rent and you can begin the booking process by clicking on an available time on the calendar. You may also click on the Spaces tab to view all the spaces in the facility which will allow you to view the calendar for only that space.
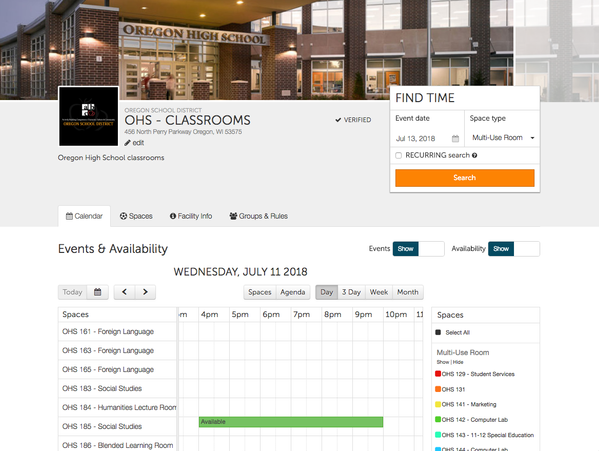
- If you choose to pick a specific facility, you may scroll down and see the calendar to view ongoing events and availability. Click on the calendar to open the booking window to begin booking your space.

- Within the booking window you will be allowed to choose blocks of time for your rental. You may choose as many blocks of time that you would like, as long as the blocks are continuous. You are also allowed to choose blocks of time for multiple dates. Click on the blocks of time to add them to your cart. After you have chose your time blocks, click Continue to Book to proceed.
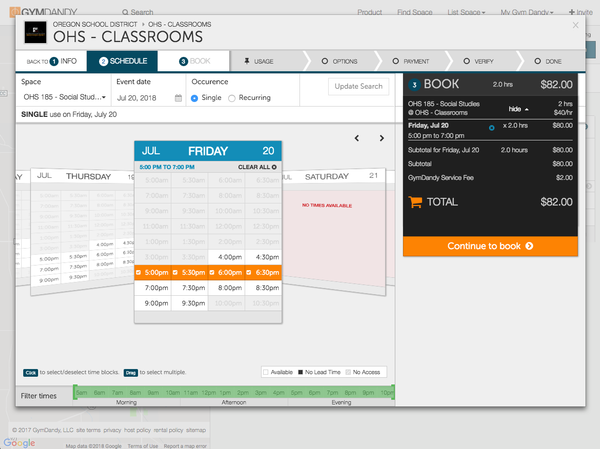
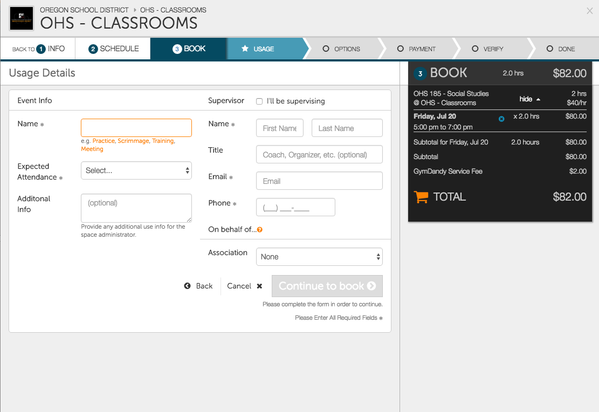
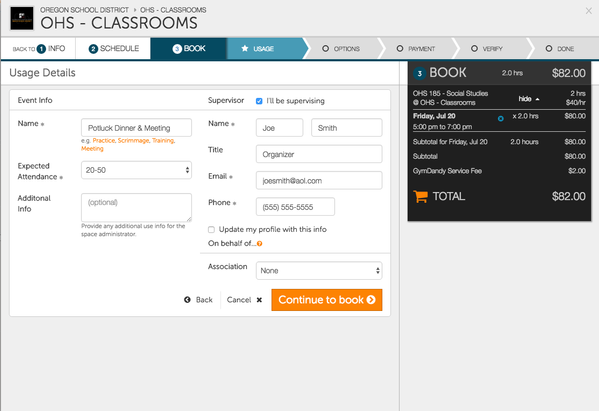
- After choosing your time, you will be directed to the Usage Details screen. Here, you will enter in details related to your booking including event name, expected attendance, and renter information (email, name, phone, etc.). Once you have filled out all of the required fields on the Usage Details page, click Continue to Book to proceed.
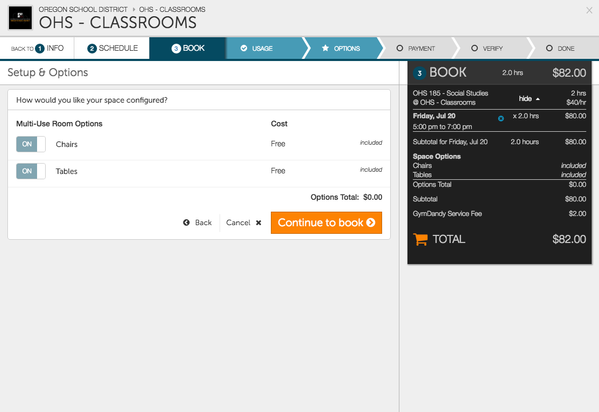
- Following the Usage Details, you will be directed to the Setup & Options page. On this page, you will get to choose any additional add-ons and setup items that you may need for your rental. Some add-ons will be automatically included in your rental, such as tables or chairs, and other add-ons you will need to click on to add them to your rental. *SOME ADD-ONS WILL COST AN HOURLY OR FLAT FEE TO INCLUDE WITH YOUR RENTAL* When you have selected all appropriate add-ons, click Continue to Book to proceed.
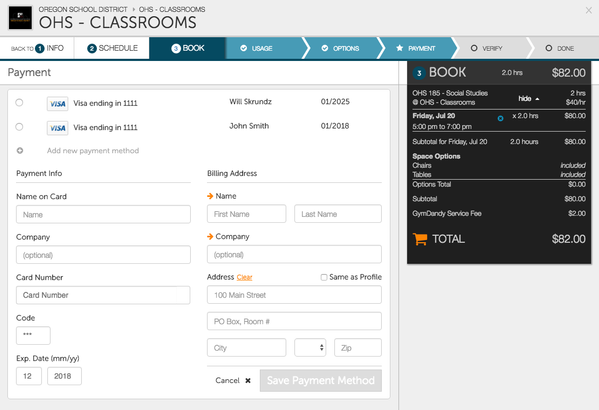
- The next screen after the Setup & Options page is the Payment page. Here, you can enter in a new payment method (Credit/Debit). You may also select an existing payment method, if applicable. After entering in your payment information, GymDandy will store your payment method so that you can easily use the same payment method to rent space in the future. Once you have chosen your payment method, click Use This Payment Method to proceed.

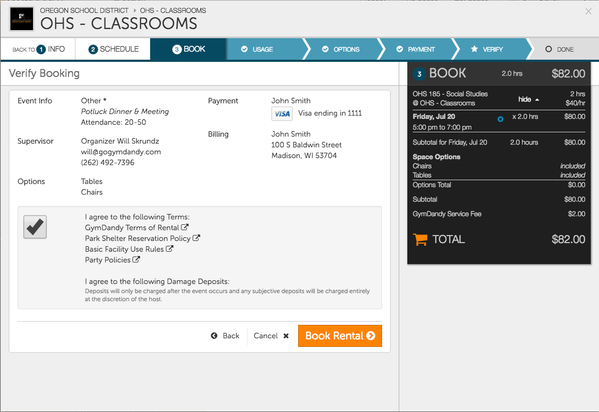
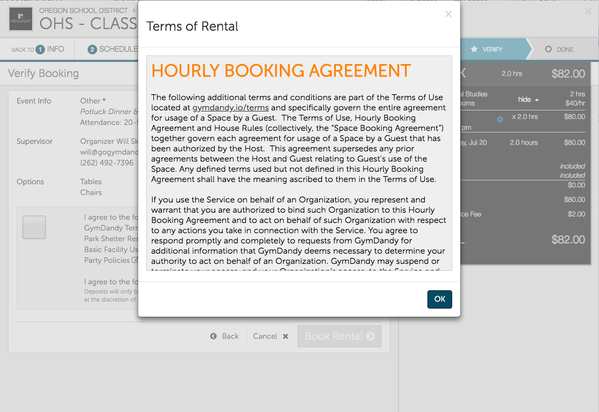
- Once you have chosen your payment method, you will be directed to the final page requiring you to verify your booking and ensure that all details are correct. The Verify Booking page will also require you to adhere to GymDandy's terms as well as the host organization's terms. You are able to view any rental terms by clicking on the terms and policies. Click the check box next to the terms to agree to terms. When you are all finished, click Book Rental to complete your rental.
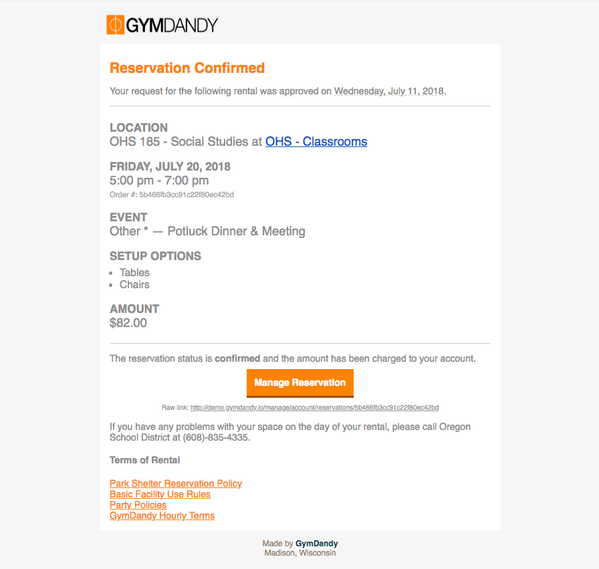
- Once you finish booking your rental, the request will be sent to the host organization. The host organization will have 3 days to review and either approve or deny the rental. You will receive an email alerting you if the host organization has approved or denied your rental. Once the host organization chooses to approve your rental, your payment method will be charged.